Thursday, 7 February 2013

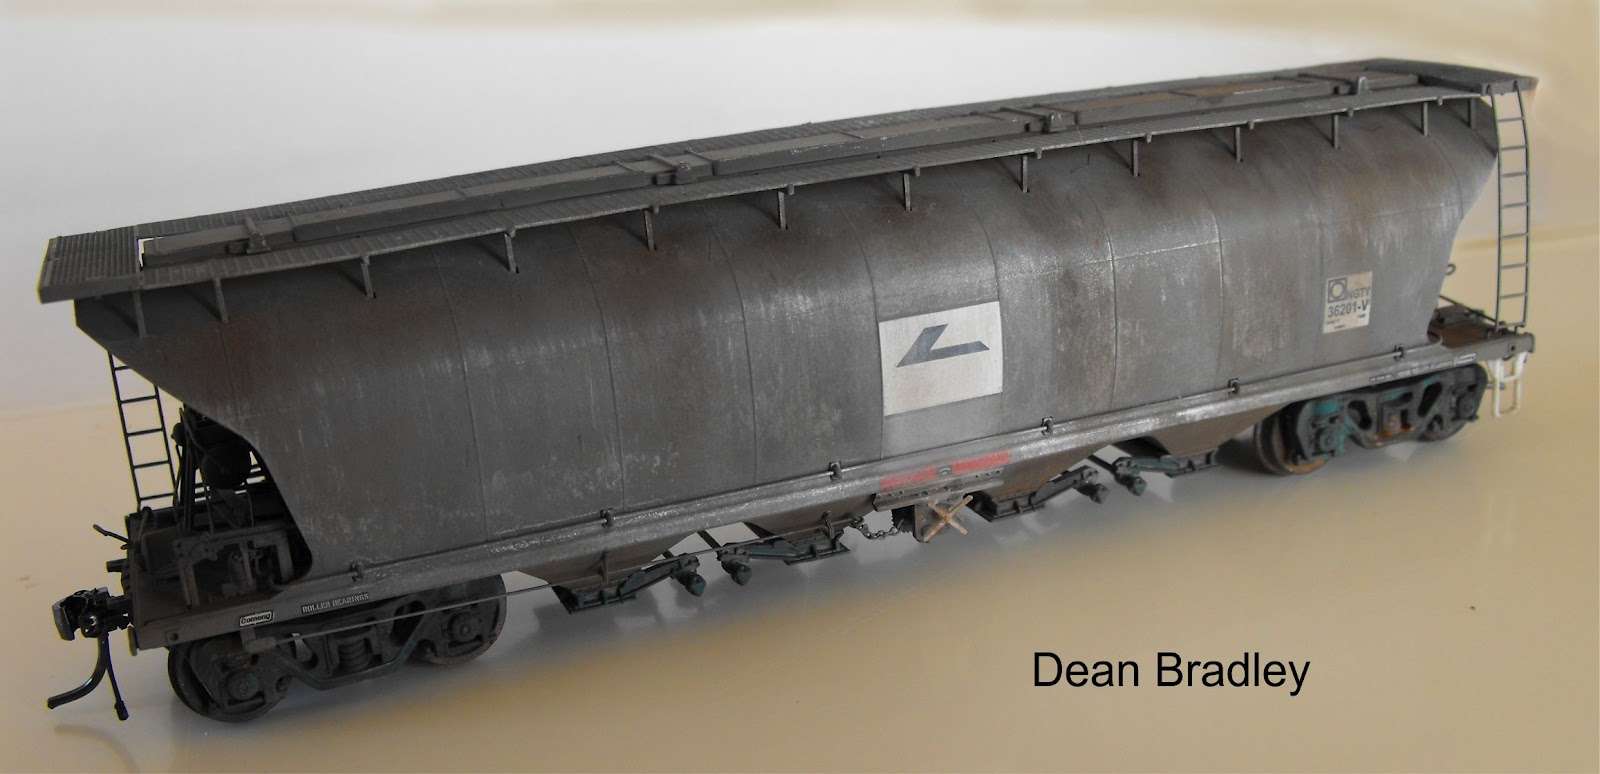
Weathering crusty cement

I received an email from a customer who purchased some of the weathering pigments I sell on Ebay, as linked below:

Shadow Grey weathering powder


The problem he had encountered was mimicking, that is weathering, the crusty dry cement found on cement wagons. I was asked if I could help out, so here we go! I should also point out he asked about dipping the wagons in real cement. I don't recommend this, as you have no control over where the cement goes and you may well just finish up with a wagon that looks like it's been dipped in wet cement.


The first thing is to build (or buy) your wagon. In this case I used an AR kits NPRX wagon with a Keiran Ryan Brass etch walkway kit which I then paint and decal. I used the gray primer as the finished colour plus a gloss coat for decals. I then dull coat the model and let it dry.  


The next step is to brush paint some clear (water base) paint on the model where you want the crusty cement .


Then add the pigment by dropping it over the wet paint and shaking the loose powder off. Don't dab at it, just leave it to dry. 


It may look thick but you can tone it down when dry by rubbing or picking at it until you have a realistic look.


I now use Extra hold hair spray over the model to blend the powders. I tone down the spotty patches by adding powder where needed, giving an even weathered apperance over the whole model.


Another layer of dull coat and some more powder work to finish off. I then weather the bogies, add the KD's, and it's ready to roll! 


Later Deano.

P.S. I will do my best to answer all your emails but please be patient some envolve a lot more work to get a blog post up with details and photos. Next I will show how to colour sand stone walls. 

Friday, 18 January 2013

NSWGR WATER TANK

Hi all,

As most of you know I have had some major computer problems that have caused me some big time headaches! I am pleased to say I'm back on track with a new PC. However, I lost all the art work for my kit instructions and sign kits. It was not an easy thing to come to terms with, as the data loss was the result of a mistake made at a PC repair shop. I kept this quite while I sorted the mess out with the repair guys. Efforts were made to recover the data, but in the end I decided to move on and get over it, before it got the better of me!

I do have printed copies of instructions and signs, so at least I will have something to go off, as I redo everything. I wish I could just scan it all but the images are not clear enough.

Once again I thank everyone for their patience and will do my best to get orders out ASAP.

Now for a modelling fix - I have worked from sun up to sun down, and then some, over the last few weeks whilst sorting my PC. I was burnt out and I needed a modelling fix! It came in the form of a Laser rail bits, timber tank stand.

An easy and enjoyable kit to assemble and I was really pleased with the end result. So I mounted it to a diorama, added extra details like bolts, inlet/outlet pipes and a tank of course (an old Rails North kit). I milled down the inside of the tank by screwing it down though the top half of each side, then ran the cutter over the parts and cut the top half off when finished. The end result gives a more realistic thinness to each side.  


                                               You'd be a Galah to drink that water!!!!


                                                        Water Column UNEEK kit 680


                     I adjusted the colour - see my Face Book page for the original and extra photos.
                            http://www.facebook.com/pages/Rails-In-scale/266244323495711


                                              Sole plates UNEEK and Woodland scenics
      Later, Deano

Tuesday, 13 November 2012

Modeling a Jacaranda tree in HO scale

Hi all,

I have completed a project modeling a Jacaranda tree that ended up turning into a diorama!

I noted the trees around the Northern Rivers NSW and Ipswich QLD, so I thoiught I would give modeling one a go by painting white sand, a few shades of pink and purple. I used water based hobby paint and airbrushed a small amount of sand in a ice cream bucket.Yes, it blows everywhere. But if you keep the airbrush well away from the sand it can be done! Shake the sand around as you paint.

I will be bringing the diorama along with me to the New England convention so I hope to see you there. The model was weathered using Dr Ben's weathering pigments on just about everything - cars, buildings, people and animals.The red Australian dirt was also pigment and looks very realistic however the photos made it much more reddish than it is.

New England Convention

I have been asked in a number of emails, and in person at the Ipswich exhibition, why I will not be demonstrating weathering techniques at this years New England Convention. The reason is that  I was not asked/invited. I thought the idea of a convention is to bring something new or different to entusiasts. If it was the same thing, done by the same people each year, wouldn't it just get boring? Anyway, if you have any questions just let me know, I'll be  more than happy to help.


Cheers Deano                                       
    

Friday, 9 November 2012

Weathering rusty iron roofs - A how-to guide

Hi all,

Another update and some weathering tips. My PC is still under repair. Most of the problems are sorted, but it's now getting some updated parts, extra USB ports and a new case...so I'm posting this from my way too small keyboard on an older-than-I-am, very slow, laptop. With a battery that lasts five seconds!

I joined facebook a few weeks back and I was asked how I weather iron roofs on my sheep wagons. So I will do my best to show you all how I did it, and I've included pictures. You can find this Facebook page at:

The first thing is to prime the roof with white primer. I use Turpentine based primer, not automotive thinner based primer, as the turps based takes longer to dry allowing the primer to stick to the surface. "Turps" primer is found in most paint shops, hardware stores and "discount stores".  If you not sure ask, and if they don't know, you are better of  shopping where they know the product. 

Turps primers white and gray - I often used gray first, then a light cover with the white
In this case I only used the white as it covers well over plastic..


The next pic shows the white primed roof with some brushed silver in random spots.  


Now coat the roof with Dullcoat as this will allow the Dr Bens weathering pigments to stick

http://www.ebay.com.au/itm/WEATHERING-PIGMENTS-that-work-DARK-DAMP-RUST-Rails-In-Scale-ebay-store-/140881189765?pt=AU_Toys_Hobbies_Model_Railways&hash=item20cd2c5b85.

Next you can add some Dark Damp rust pigments around but not over the silver. It will cover well over the white primer.


Now add fresh dry rust making sure you keep some of the dark rust showing and give the whole roof a light dusting with the dry rust. Now I cover with a light coating of dullcoat and reapply pigments, that is if some of the weathering has been toned down too much by the dullcoat.


And there you have it. A weathered rusty iron roof!

Later Deano


Saturday, 20 October 2012

Damage control..What a month

Hi all,

Well it's about time I posted an update, things have been flat out and it's not getting any better at least, for the short term. I will start with the bad news. When I returned from the Liverpool Exhibition, I went to boot up my PC.....and nothing! To cut a long story short the hard-drive was dead. I had backed up most of my data however, I will have to redo most of my HO scale sign range (see Ebay link). I will also have to re-do the Coil-wagon instructions, and with regret, this will be another setback on an already slow delivery. I have prints of everything so it won't be a big project, but one that will be painstaking to rectify.. I can't just  make photocopies, as the images in the instructions will not be clear enough.

I have about half a dozen instruction sets printed, so that will keep me going for a wile. However, I may be too busy to redo some of the signs. So, once all stock is sold on E-bay, I will stop listing therm, until I find time to play with the artwork. On the positivre side I have been forced to learn how to use my I-phone and set the internet up on my laptop!! I am slowly overcoming my technophobia.

Now to the good stuff.

Thanks to everyone who stopped by the Rails In Scale stand at Liverpool. I hope you all enjoyed the weekend as much as I did. I did a bit of weathering over the weekend showing the use of the Doctor Ben's weathering pigments, and I was suprised and grateful how quickly I sold out of stock. I am very pleased that so many people bought the powders to have a go themselves! I've opened a Facebook page so please follow it, as I will be posting some tips and tricks to weathering soon. As soon as more pigments arrive, I will list them on the RIS E-Bay store.


Rails In Scale will be attending the Ipswich model train show at the Ipswich rail museum on the 27-28 October 2012.

I will be demonstrating the weathering techniques I use to weather all my models. I will also bring along the remainder of my HO scale signage and detail items, that is until I've sorted out my PC. Don't forget, Dr Ben's awesome weathering powders will also be available.

Hope to see ya there,
Deano

.


Sunday, 19 August 2012

Eureka models NSWGR sheep wagon

Hi all,

It's been another busy weekend. I have completed the Rails In Scale coil wagon instructions although I still need to re-draw one image. But apart from that, they are ready to print. I hope to start sending kits out next week and I will start with all paid orders. If you have ordered and not yet paid, I will contact you when your kits are ready for post.

After my late night completing the instructions, I decided to have a weathering fix. My Eureka models bogie sheep wagons arrived last week and as soon as I took them from the box, I could see this was a first class model and was begging for some weathering. About the only thing I could have a winge about was that the wheels are shiner than Her Majesty's best silverware. Apart from that, it's a great model.

Eureka had the foresite to design the wagon so you can take it apart. You add sheep by simply removing the buffers and floor, and then unclipping the roof. After you add the woolies, you just clip the roof back on, and insert the floor, replace the buffers (or pins on NSSF) and your set to go.

Cheers Dean,


Thursday, 16 August 2012

Murwillumbah Model Railway & Hobby Exhibition 2012

Hi All,

The Murwillumbah exhibition went ahead last weekend and as stated in my previous post, I was there to promote weathering to any that would listen. Thankfully, visitors were keen to learn and better still, try it out for themselves! The layouts were of a high quality, and plenty of other models were on display. Everything from cars and planes to ships and boats. Also on display were woodworking crafts and  retail model suppliers.

Over the weekend I worked on a few models demonstrating what can be done with Dr Ben's weathering pigments. Some people said I made it look easy, but the truth is Dr Ben's product makes it easy! The stuff just works! I will do my best to get down to the Sydney exhibition and if I do make it, stop by and take a look for yourself.